It’s Your Birthday Place Mat
This whimsical mat can be made with any fabric you choose. For a personal touch, make one for each family member in their favorite colors. Use cotton fabrics and batting and your place mat is machine washable.


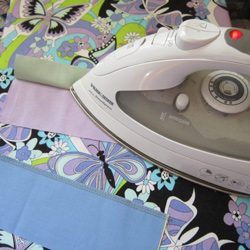
Materials
- Wide rickrack
- Narrow rickrack
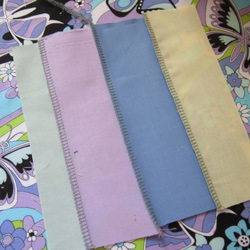
- 5 patterned fabrics
- 1 solid yellow cotton fabric
- 3 solid cotton fabrics (color of your choice)
- Batting
- Thread
Tools
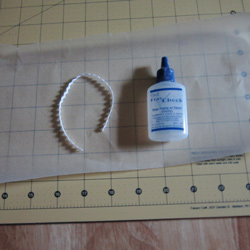
- Fray check
- Square ruler, or sheet of wax paper for template
- Standard sewing tools
Directions
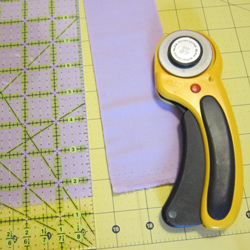
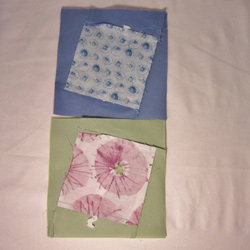
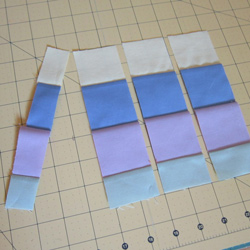
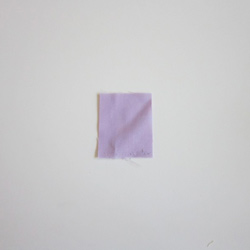
- Cut 4 ½” squares from four patterned cotton fabrics.
- Cut 5” piece of wide rickrack for each square.
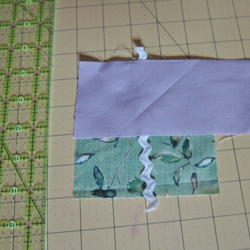
- Cut 2 ½” x width of fabric (WOF) strip of solid cotton to use as borders for your package squares.
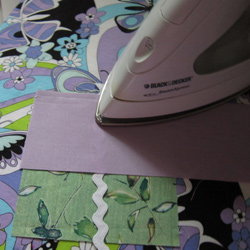
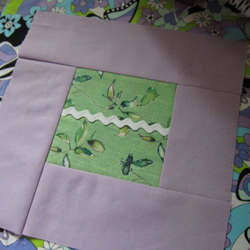
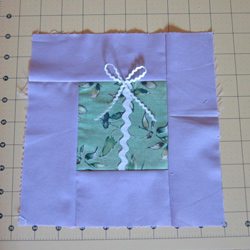
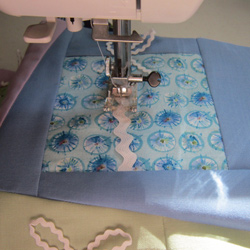
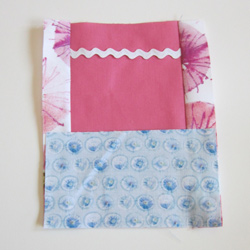
- With right sides together, sandwich rickrack between the solid strip and the patterned square, lining up top and left edge as shown.
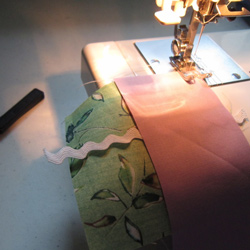
- Stitch with ¼” seam.
- Press seam flat from wrong side, then open gently with iron pressing seam toward strip.
- Trim excess solid strip even with square.
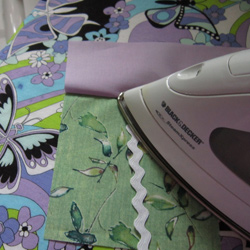
- Add another solid strip to the right side of square. Then stitch and press open as in Steps 5 and 6. Trim solid strip even with square as in Step 7.
- Repeat for all four sides of square.
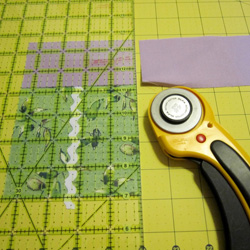
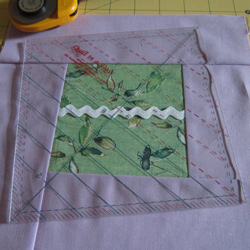
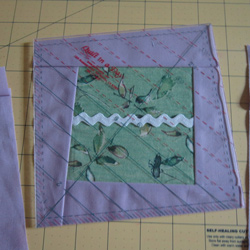
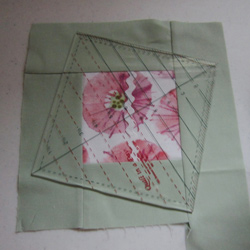
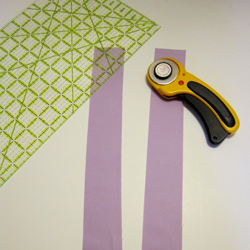
- Using 6 ½” square ruler or template made from wax paper, center square at an angle. Check all four corners to make sure that they are not being cut off. Cut around all four edges with rotary cutter.
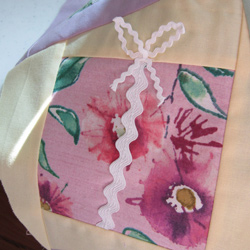
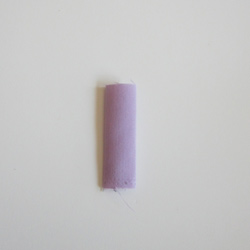
- Cut 7” piece of narrow rickrack. Add fray check to each end.
- Make two loops in narrow rickrack to form a bow shape (don’t really tie into a bow because it is too bulky). Stitch in place at top of package, above wide rickrack.
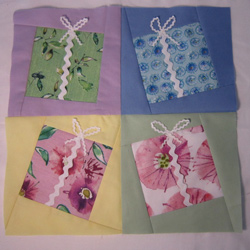
- Make three more packages in the same way. IMPORTANT NOTE: On two of the packages, when you cut the square, tilt ruler in the opposite direction as shown.
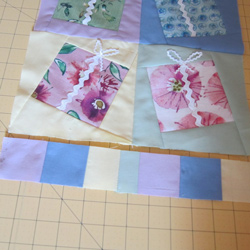
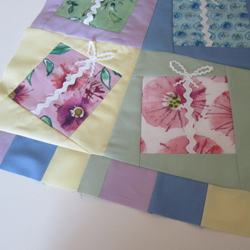
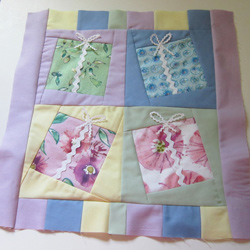
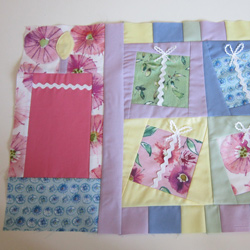
- Lay four package blocks as shown.
- Flip rows right sides together and chain sew along right seam. Leave thread between rows intact.
- Press sewn seams in opposite directions so that row seam will lock together.
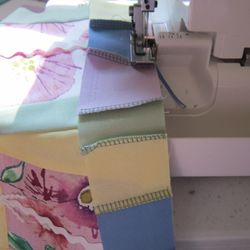
- Use a straight stitch down the center of rickrack to secure each package.
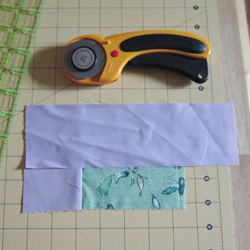
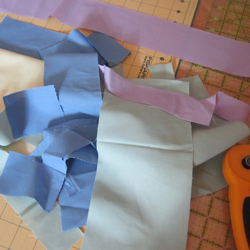
- From leftover scraps of solid cottons, cut a strip of each fabric around the same length. Widths can vary.
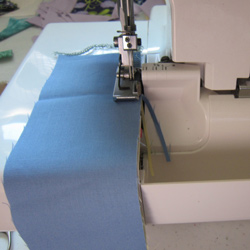
- Stitch these strips right sides together along long edges. I used a serger for speed, but a regular stitch would work fine. Press seams to one side.
- Cross cut joined strips into 2” segments. Join enough of these segments along their short edges to cover bottom and top of tilted package section. Sew strip to top and bottom. Press seams toward packages.
- Next, cut two solid pieces, 2” by 15” each. Stitch them to sides of place mat, press toward solid.
- This is what the place mat looks like so far.
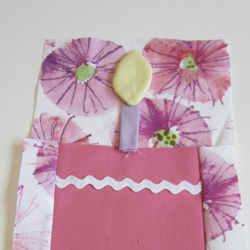
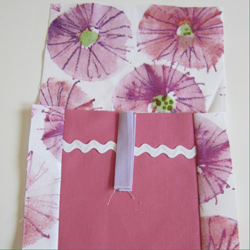
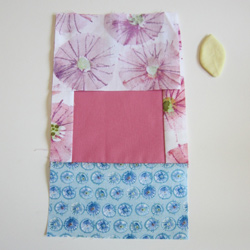
- Cut one solid piece 8” x 4.75” for cake, two patterned strips 8” x 1.25” for side background pieces, one patterned piece 6.25” x 4.25” for top background, and one patterned piece 6.25” x 3.5” for cake base. Also cut a strip of wide rickrack 5” long.
- Place rickrack about 1 ½” down from top of solid cake piece. With right sides together, stitch side background pieces to either side of solid cake piece, enclosing ends of rickrack in seam. With right sides together, stitch cake base piece to bottom of cake and side piece unit.
- With right sides together, stitch cake base piece to bottom of cake and side piece unit.
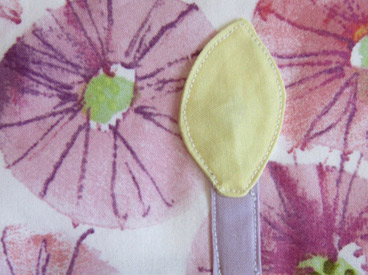
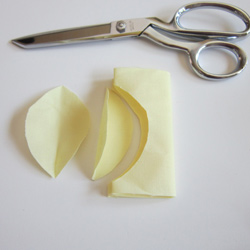
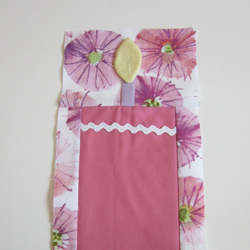
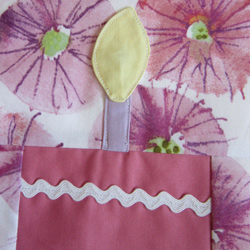
- Cut a rectangle of yellow solid for flame, approximately 3” x 6”.
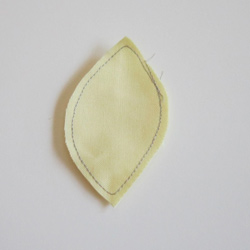
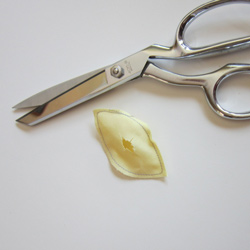
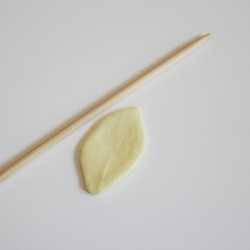
- Fold short ends to middle, and then fold in half. You will be cutting through four layers of fabric. Cut flame shape as shown. Stitch both flames together close to the edge, all the way around flame shape. Clip middle of one side with scissors, and turn right side out. Poke out edges and press.
- Cut a 2” x 1” rectangle.
- Fold long sides to middle. Lay out on background to check position, then sandwich between top background and cake piece right sides together and stitch. Press up, position flame on top, and topstitch around flame and candle to secure to background.
- Sew cake section to rest of place mat.
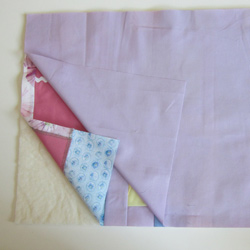
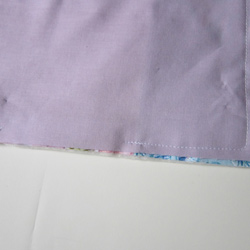
- Layer in the following order: batting, then backing and top right sides together. Stitch around place mat with a ½” seam, leaving an opening for turning. To avoid “dog ears,” take a stitch or two at an angle across each corner as shown.Trim seam and clip corners. Turn right side out.
- Quilt as desired. I quilted in the ditch around the cake and present shapes, and did free motion quilting everywhere else. I’ve included some pictures of the front and back so that you can see the quilting.


")
This is an original pattern and is for personal use only. Do not sell or redistribute this pattern in any form. Selling the completed items made from this pattern is not permitted, without written permission from Kym Delmar. You may contact Kym at [email protected] with any questions.
Become a Saturday Evening Post member and enjoy unlimited access. Subscribe now


Comments
Love this tutorial. What a sweet idea to celebrate birthdays!
We’re glad you like it. I love the idea of making it for a newborn and creating a special birthday tradition! Let us know if you give it a try!
—
Cassandra Orton | Web Editor
The Saturday Evening Post
Great tutorial! I love this idea. It would actually be a great present for a newborn to give, along with a quilt, and it could become a birthday tradition to use the placemat. 🙂
This quilt is so cute and I love the idea of making one for each family member!
This is just too cute! Thanks for the pattern.