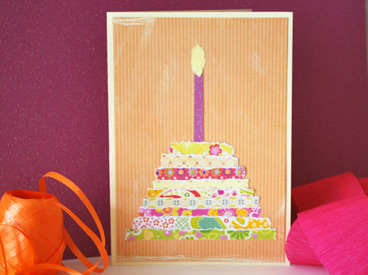
Create unique handmade birthday greetings with leftovers: Use scraps of wrapping paper, scrapbooking paper, or even recycle old birthday and greeting cards as your materials to build this fun and funky cake card.
Find paper scraps that are in the same color family but with variant patterns to make this card extra funky.
How to Make the Scrap Cake Birthday Card
Materials for front of card
- 1 large solid colored sheet of card stock (8 ½” x 11″)
- 1 handmade or store-bought envelope (5″ x 7″)—Click here for a handmade envelope tutorial at craftingmom.com.
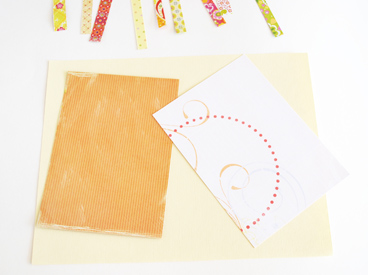
- 1 sheet of decorative paper or card stock (5″ × 7″)
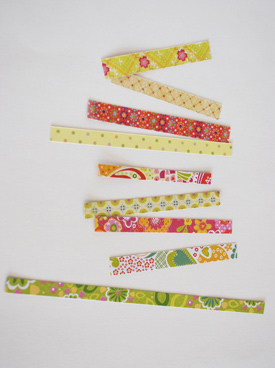
- 10 strips of paper or card stock (¼” wide and 3-5″ long)
- 1 scrap of yellow/orange/red paper or card stock (1″ x 1″)
- Craft glue, such as Tacky Glue
- Double-sided permanent adhesive mounting squares (optional)
- Paper cutter or scissors
Optional materials for inside card
- 1 sheet of decorative paper or card stock (5″ × 7″)
- 1 small scrap of paper (2″ x 3″)
- “Happy Birthday” stamp
- Ink pad
- Corner rounder
Directions for front of card
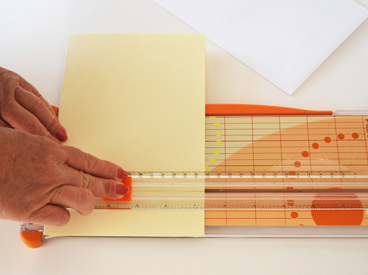
- Fold the large sheet of card stock in half crosswise to create the base of your card—trim if necessary to fit in your envelope.
- Cut the decorative sheet slightly smaller than half of folded card stock (about ⅛” smaller on each side looks best). This will be the front of your card.
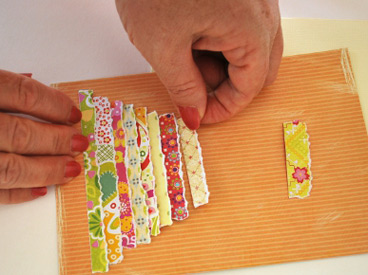
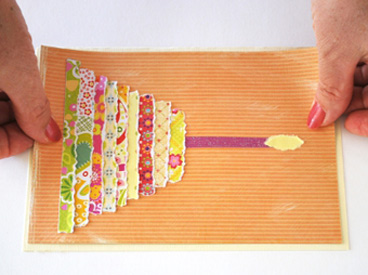
- To create the cake, arrange 9 of the 10 strips horizontally in the order you want them to appear on the card (these will become the cake layers). Set one strip aside for the candle.
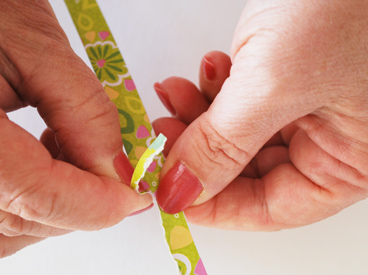
- Pick up the bottom layer of the cake. Holding it vertically, tear a thin piece off the top (as shown below). Then turn the strip horizontally, and tear the right and left sides off of the strip so that it measures about 4″ long. Continue working up the cake layers in this fashion, tearing off the tops of each strip. When tearing off the sides, each scrap should be slightly shorter than the strip below it.
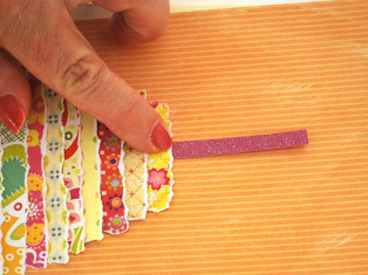
- Beginning with the bottom layer, glue each strip onto the decorative sheet. (TIP: To create a stacked look, glue only the bottom edge of each strip so that the next piece can be tucked under the top of the previous layer.)
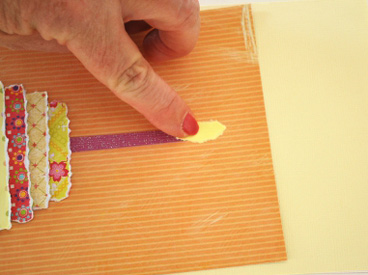
- Cut the scrap you set aside for the candle to about 3″ long. Then, glue the scrap (vertically) onto the front of your card, as shown below.
- Tear the scrap of yellow or orange paper into a flame shape. Glue to the top of the candle.
- Using craft glue or double-sided adhesive, attach the decorative sheet to the front of your card.
Directions for inside card
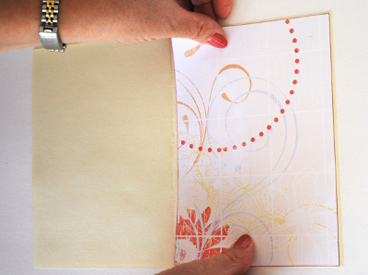
- Cut the decorative sheet slightly smaller than half of folded card stock (about ⅛” smaller on each side looks best). Using glue or double-sided adhesive, attach the sheet to the inside (right side).
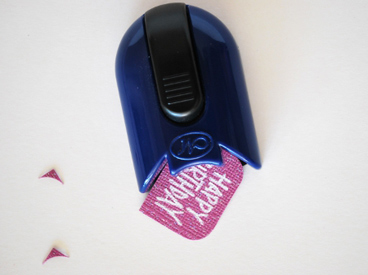
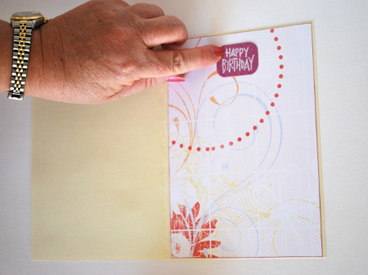
- Using your stamp and ink pad, stamp “Happy Birthday” on the 2″ x 3″ scrap of paper. Round the corners with the corner rounder and attach to the inside of the card using glue or double-sided adhesive.
Become a Saturday Evening Post member and enjoy unlimited access. Subscribe now