This is a little tutorial on making fabric-covered cards. I’m sure you can find lots of uses for these, maybe even using them as gift cards with your Christmas presents. Plus, it is a great way to use up some of your left over fabric scraps.
I am demonstrating making small gift cards, but you could easily adjust this technique to make larger greeting cards. This idea is adapted from a tutorial on Etsy, which you can access here. The main difference between the Etsy method and mine is that they used Modge Podge to make their cards, which I found messy and not as effective at keeping the edges adhered.
Fabric-Covered Greeting Cards
Materials
- Fusible web
- Fabric scrap a little larger than 8 ½” x 11″
- 8 ½” x 11″ card stock
Tools
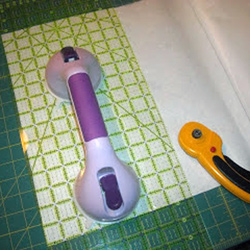
- Cutting tools
- Cutting mat
- Iron
Directions
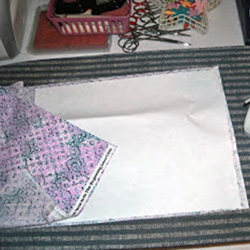
- Cut the fusible web slightly smaller than 8 ½” x 11″, then adhere it to the wrong side of your fabric scrap. Trim roughly. Then remove fusible paper and adhere fabric to cardstock.
- Take a ¼” off each long side, and ½” off each short side, You will be doing some more trimming after the next step.
- Fold the piece of paper in half, short sides together, parallel to the grain.
- The direction you fold paper is actually very important as to how smooth the fold will be. That is because paper has a grain line, much like the warp and weft in a fabric weave. If you fold parallel to the grain, you will get a nice, smooth fold with little to no resistance. If you fold against the grain, you will get resistance, and the paper may actually break or tear on the fold. You can test which is the right way to fold by gently bending the sheet of paper in both directions. The wrong direction will feel more resistant to your fold.
- Open your first fold, and use the middle fold line as a guide. Fold again in the same direction, one short side to the middle as pictured below. Now cut through both thicknesses along the middle edge. These trimming steps are to make the card even on all sides. It is hard to make the edges even if the card is trimmed first and then folded. Trust me, I’ve tried.
- You will now be working with half of your original sheet of paper, folded in half. Slice this strip into 2″ pieces.
- Repeat steps for the second side of the piece of paper. You could also print on the cardstock before adhering fabric, as I have done on these little thank you cards. And you could trim the card edges with a decorative blade to get some nice effects. I’m sure you can come up with more ideas for this technique. Maybe add some stitching or embellishment?


Click here for more holiday crafts!
Become a Saturday Evening Post member and enjoy unlimited access. Subscribe now