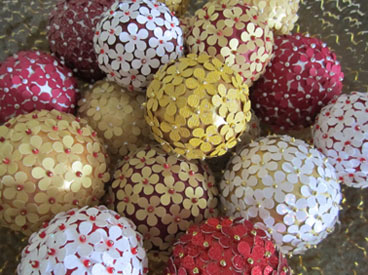
Decorative Paper and Bead Ball Ornaments
Making these beautiful balls is so fun and fast using decorative paper punches! Every year I like to have a holiday party just for the girls, and what would a party be without a party favor? These are this year’s party favor!
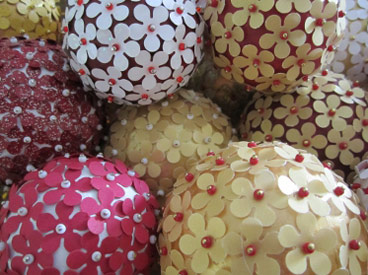
You could use a bowl of the flower balls to match your home’s decor. I love them just in a large glass bowl! It’s a fun and inexpensive way to add color and texture to your coffee table.
Decorative Paper and Bead Ball Ornaments
Materials
- Acrylic paint for foam balls
- Smooth foam balls, your choice of size. (I’m using 2” and 3” balls.)
- Card stock paper
- Glass seed beads in coordinating colors
- Optional: for hanger, eye pins or wire; fishing line, ribbon, or string; Tacky glue
Tools
- Paint brush
- Toothpicks
- Foam sheet or cardboard box
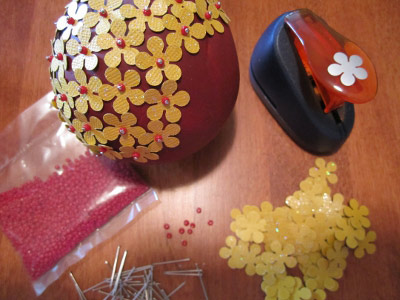
- Decorative punch (I use a flower-shaped punch)
Directions
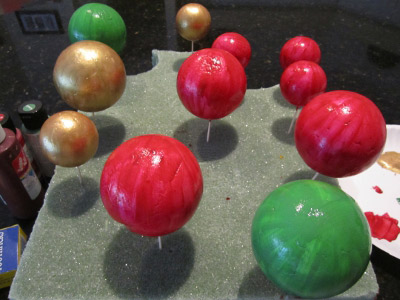
- Start by choosing your paint colors, and paint foam balls. I find it’s easier and faster to stick a toothpick into the ball, paint the ball, and then stick it into foam sheet or cardboard box to dry (the toothpick hole will be covered with flowers). You do want a good coat of paint, but remember you will be covering it with flowers.
- While the balls are drying, start punching your shapes from the card stock paper. I tried to count them when I was making this 3″ ball, and I had around 80 flowers. The number of shapes you punch will depend on how close together you want to put them. Since I was making about 75 covered balls, I just punched each of the colors I wanted to use, and put them in bags. When I ran out of a certain color, I just punched more.
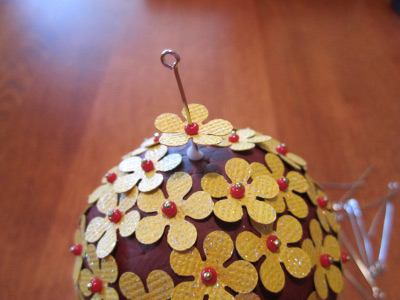
- Pick your bead color, slide one bead onto the pin, and stick it on a punch shape. Now, I just pushed it right into the ball, but you could dip the end of the pin in Tacky glue if you felt like it needed it. Since I was making so many, I found it easier to slide the bead and flower on, make a bowl full of them, and then put them on the balls.
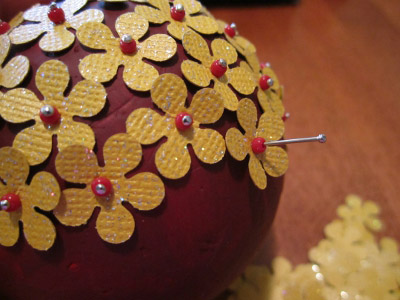
I found the sequin pins from Jo Ann Fabrics for 99 cents for 300, and of course I used a coupon. But any thin, straight pin will work. You just have to make sure the bead you use as your center will slide on and stay on. I also found that if the card stock was super thick (like some of the heavy glitter ones from Michael’s) it was too hard to punch and way too hard to push a pin through—just thought you should know!
Remember, it’s up to you to choose how close together to put the flowers. It gives you a different look when the flowers are on top of each other. If you do not glue the pin into the ball, it’s no problem to move the flower pin around, which you might need to do when you are fitting in the last ones.
- To make a hanger, I’m using an eye pin (which is used to make jewelry), but it works well for this project. You can also use wire. First, slide the seed bead on, then a flower. Dip the end of the pin in Tacky glue and push it into the ball. Tie fishing line or ribbon onto the pin, and hang your ornament!
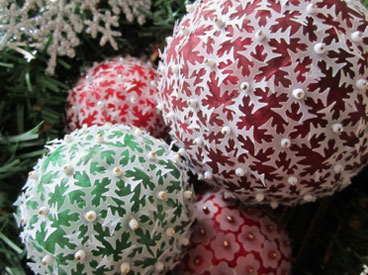
Tip: I found velum paper works well—I used velum paper for the snowflake balls, shown below—and it’s a beautiful look. It comes in colors like red, gold, and silver.
Think about choosing different punch patterns: hearts, snowflakes, two different sizes of flowers. What shapes do you have?
Did you know you can get the foam in oval or egg shapes to use as Easter eggs? How much fun! How about making a topiary? Cover one or two large balls with flowers, wrap a wooden dowel rod to use as the stem, and place it in any vase or pot. Could be so pretty for a baby shower or a bridal shower center piece.
Click here for more holiday crafts.
