The onset of freezing temperatures spells the end to most gardening activities, but some gardeners just don’t want to throw in the trowel. And why should they, when they can create their own microclimate in an inexpensive cold frame.
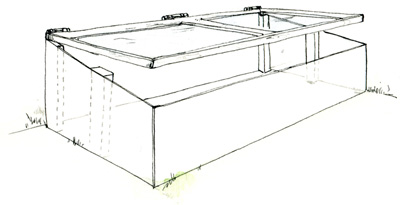
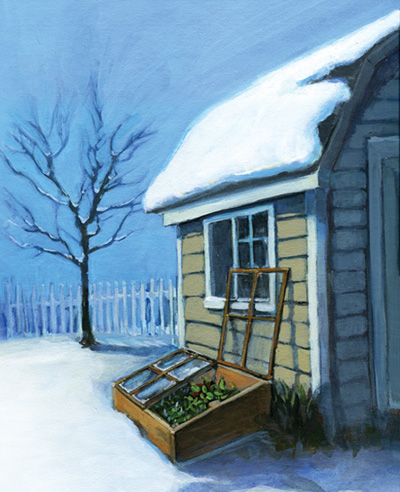
Greenhouse growers have long used cold frames to harden off vegetable and flower seedlings. Transparent-roofed enclosures, built low to the ground and placed in a sunny location, cold frames are minigreenhouses whose tops can be opened, allowing new starts to acclimate before they are planted in the garden. But today’s home gardeners rely on them just as much to extend the harvesting season. Plants sheltered in a cold frame are protected from chill winds and rain. Solar energy captured through the glass or transparent plastic lid keeps the soil from freezing. With an inside temperature 7 to 10 degrees Fahrenheit warmer than outside, a cold frame environment simulates a growing location 300 miles farther south.
With a cold frame, gardeners may harvest cold-tolerant vegetables and greens for a month longer in the fall and enjoy crisp homegrown salads a month earlier in the spring. Some hardy plants such as Swiss chard can survive all winter in a cold frame if it is covered with a heavy cloth on the coldest nights.
Building a Cold Frame
Commercial cold frames range in price from $99 to more than $450 and are available from garden supply stores and over the Internet, through such Web sites as yardiac.com and thefind.com, among others.
But you can save money by using salvaged materials to build your own.
All you need is an old window frame for the top and some lumber. You can even use an old shower door—clear or frosted—for the top, which only needs to be translucent to allow solar energy to pass through and warm the soil below.
A cold frame can be any length, but limiting the depth to 4 feet or less can spare you from having to stretch when planting and harvesting.
Before you begin, find a proper location. Your cold frame should be placed in a south-facing spot that receives sun for most of the day. Up against a house, garage, or outbuilding is a preferred location, but simply setting one out in your garden patch will work.
Take care that the soil under your cold frame has good drainage. If you are unsure, dig down a couple feet and fill with gravel, then place a layer of soil over the stone.
For an early-spring crop, plant seeds directly in the cold frame in mid-January. When the soil begins to warm, the seeds will sprout. (For an early-winter crop, plant in late August or September.)
Prop the top open during the day to vent excess heat in spring and fall. You won’t need to vent in winter. Also keep the soil watered until freezing weather sets in. The soil under a cold frame will dry out more quickly than outside.
Cold Frame Plan

Using a salvaged window 32″ x 26″
Materials:
- 2 8′ 1” x 6” pine boards
- 1 4′ 1” x 2” pine board
- 14 1½” exterior grade screws
- 16 1¼” exterior grade screws
- 3 2” hinges
- 18 1” exterior grade screws
Directions:
1. Cut 3 30” 1” x 6” boards and 4 24” 1” x 6” boards. Build 30” x 24” bottom frame. Predrill and screw sides onto front and back pieces with 2 1½” screws at each end.
2. Attach 2 10½” 1” x 2” braces to the inside back corner of the frame using 1¼” screws. Predrill and attach top back piece to the corner braces.
3. Place the top side pieces in position. Using a straight edge, scribe a line from the top of the back to the front bottom corner of the board. Cut each board on this angle.
4. Attach one angled board to the back and one through the tip into the bottom frame using 1½” screws. Attach a 9” 1” x 2” brace—made from the 4′ pine board— at the center of each side with 1¼” screws.
5. Place the window on the box. Position correctly and mark for the hinges. Predrill the hinge holes and screw the top, using 1” screws, into place.
Become a Saturday Evening Post member and enjoy unlimited access. Subscribe now


