Curtis Stone’s Bird to the Wise
Sitting down with family and friends with a meal you prepared is one of the simplest and greatest gifts you can give someone.
As a busy parent and chef, I know that balancing work and home life is no easy task. Despite the challenges, it’s still possible to serve budget-friendly, hassle-free, and healthy home-cooked meals.
America’s go-to protein, chicken is a dinnertime staple, but if you’re tired of serving the same recipes week after week, it’s time to switch up your bird game.
Look at a whole chicken as a blank canvas. You can keep a recipe basic or ramp it up with spicy heat, herbaceous flavors, and, as always, seasonal vegetables.
The beauty of the Roasted Butterflied Chicken and Tomatillos recipe is how flavors mix and mingle during cooking. As the tomatillos roast, they soften into a mouthwatering chunky salsa verde and are seasoned with the chicken’s juices. While the recipe calls for tortillas, you can spoon it over rice, polenta, or mashed potatoes.
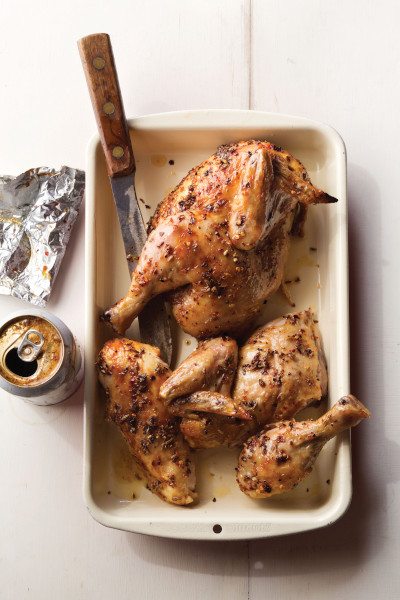
Steam from the brew in Beer Can Chicken with Tomato Toast keeps the meat moist and juicy, and the can props the chicken up, so it roasts evenly. The garlic, fennel seeds, crushed red pepper flakes, thyme, and tomatoes add a distinctive herbaceous flavor to the meat, but I encourage you to come up with your own combinations.
Roasted Butterflied Chicken and Tomatillos
(Makes 6 servings)
- 1 4-pound whole chicken
- 4 teaspoons olive oil
- 2 teaspoons sweet paprika
- 1 teaspoon ground cumin
- 1 1/2 pounds tomatillos, husked, rinsed, and cut in half
- 1 white onion, halved and cut into ½-inch-thick wedges
- 3 garlic cloves, finely chopped
- 1 jalapeño pepper, seeded and finely chopped (for a hotter sauce, keep the seeds)
- 1/4 cup coarsely chopped fresh cilantro
- 1 lime, cut into wedges, for serving
- 6 whole-wheat flour or corn tortillas, warmed, for serving
Preheat the oven to 400°F. Using poultry shears, split chicken open by cutting down one side of backbone, then cut out and remove backbone. Place chicken skin-side up on chopping board. Put your hand on breastbone and press hard to flatten chicken.
Heat very large cast-iron or other heavy ovenproof skillet over medium-high heat. Meanwhile, in small bowl, mix 2 teaspoons of olive oil with paprika, cumin, and 1 teaspoon pepper. Season with salt. Rub mixture all over chicken. Place chicken skin-side down in hot skillet and cook for about 4 minutes, or just until skin side is golden brown. Transfer chicken to large plate. Set skillet aside.
In large bowl, toss tomatillos, onions, garlic, and jalapeños with remaining 2 teaspoons olive oil. Season with salt and pepper. Arrange half of tomatillo mixture in skillet and nestle chicken on top, skin side up. Scatter remaining mixture around the chicken. Move skillet to oven. Roast for about 45 minutes, or until chicken shows no sign of pink when pierced in thickest part with tip of small, sharp knife and tomatillos are falling apart into sauce. Remove from oven and let stand for 10 minutes.
Season tomatillo salsa to taste with salt. Sprinkle cilantro over chicken and salsa and serve with lime wedges and tortillas.
Per serving
- Calories: 532; Total Fat: 29 g
- Saturated Fat: 8 g; Sodium: 251 mg
- Carbohydrate: 34 g; Fiber: 6 g; Protein: 34 g
- Diabetic Exchanges: 1.5 starch, 4 lean meat, 2 vegetable, 3.5 fat
Beer Can Chicken with Tomato Toast
(Makes 6 servings)
- 2 tablespoons extra-virgin olive oil, divided, plus more for drizzling
- 4 garlic cloves, divided; 2 finely chopped, 2 whole
- 2 teaspoons fennel seed, coarsely crushed
- 1 teaspoon crushed red pepper flakes
- 1 4-pound whole chicken, patted dry
- 1 12-ounce can of beer
- 6 3/4-inch-thick slices baguette
- 4 tomatoes, halved crosswise
- 1 teaspoon fresh thyme leaves
Mix 1 tablespoon oil, chopped garlic, fennel seed, pepper flakes, and 1 teaspoon pepper in small bowl. Season to taste with salt. Rub mixture all over chicken. Cover and refrigerate for at least 1 hour and up to 1 day.
Prepare covered grill for indirect heat: Preheat all burners over high heat for 20 minutes. Turn off middle burner(s) and keep both side burners on high heat. Temperature gauge should read between 375°F and 400°F.
Pour off (or drink!) half of beer. Wrap aluminum foil around sides of beer can and place on heavy baking sheet. Carefully position chicken over beer can so it steadily rests upright on top of can. Place baking sheet over unlit portion of grill. Cover grill.
Cook chicken, rotating 180° halfway through cooking, for about 1 hour, or until chicken skin is golden brown and crisp, juices run clear, and a meat thermometer inserted into thickest part of thigh registers 165°F.
Using tongs, transfer chicken and can to cutting board. Remove can from chicken. Rest chicken, breast side up, on board 10 minutes.
Meanwhile, grill bread over lit burners for 2 to 3 minutes per side, or until toasted and lightly charred. Rub whole garlic cloves over toast. Rub halved tomatoes over 1 side of toast until tomato flesh is covering them (use 1 tomato half for 2 slices of toast); discard tomato skins. Drizzle tomato toast with 1 tablespoon oil and sprinkle with salt.
Carve chicken and place on platter with toast. Sprinkle with thyme and serve.
Make-Ahead: Chicken can marinate in spice mixture up to 1 day, covered and refrigerated.
Per serving
- Calories: 700; Total Fat: 29 g; Saturated Fat: 7 g; Sodium: 804 mg
- Carbohydrate: 47 g; Fiber: 1 g; Protein: 40 g
- Diabetic Exchanges: 2.5 starch, 4 lean meat, 1 vegetable, 4 fat
Want more chicken recipes? Check out Curtis Stone’s Simple Roast Chicken and Potatoes at saturdayeveningpost.com/roastchicken.
This article is featured in the September/October 2020 issue of The Saturday Evening Post. Subscribe to the magazine for more art, inspiring stories, fiction, humor, and features from our archives.
From What’s for Dinner? by Curtis Stone. Copyright © 2013 by Curtis Stone. Excerpted by permission of Ballantine Books, a division of Random House LLC. All rights reserved.
Recipes © Curtis Stone
Featured image: Roasted Butterflied Chicken and Tomatillos (Quentin Bacon)
Curtis Stone’s Simple Roast Chicken and Potatoes
This mouthwatering bird is a classic, and every family has their favorite version. Well here’s mine, which is made with just a few ingredients but has served my family and me very well over the years. Follow this recipe for a golden bird with juicy meat and some of the tastiest potatoes you could hope for. Stick with small Yukons — they are the perfect size, and their waxy skins become nice and crunchy.
Simple Roast Chicken and Potatoes
(Makes 6 servings)
- One 4-pound whole chicken, legs tied together
- 1 ½ tablespoons grapeseed oil
- 12 small Yukon gold potatoes (about 6 ounces each), halved
- 1 tablespoon all-purpose flour
- ¾ cup reduced-sodium chicken broth
Instructions
Position rack in center of oven and preheat oven to 425°F.
Place chicken on large heavy rimmed baking sheet. Rub ½ tablespoon of oil all over chicken and season with salt and pepper. In medium bowl, toss potatoes with remaining 1 tablespoon oil to coat. Season potatoes with salt and pepper and place them around chicken.
Roast for 55 minutes, or until thickest part of chicken thighs reach 160°F and the juices run clear when pierced and potatoes are tender but crisp on outside. Transfer chicken and potatoes to platter and let rest for 10 minutes before serving.
Meanwhile, pour pan drippings into small liquid measuring cup. Spoon off fat from drippings, reserving 1 tablespoon of fat. In small heavy saucepan, heat reserved fat over medium-high heat. Whisk in flour. Continue whisking for about 1 minute to cook flour. Whisk in pan drippings, broth, and any juices that have accumulated on platter. Simmer, whisking, for about 2 minutes, or until gravy thickens slightly. Season to taste with salt and pepper. Serve chicken and potatoes immediately with gravy.
Leftover chicken can be stored airtight in the refrigerator for up to two days and used for sandwiches, salads, or soups.
Per serving
- Calories: 586
- Total Fat: 26 g
- Saturated Fat: 7 g
- Sodium: 273 mg
- Carbohydrate: 56 g
- Fiber: 6 g
- Protein: 35 g
- Diabetic Exchanges: 4 starch, 4 lean meat, 4 fat
This article is featured in the September/October 2020 issue of The Saturday Evening Post. Subscribe to the magazine for more art, inspiring stories, fiction, humor, and features from our archives.
Credit: Photo by Ray Kachatorian. Excerpted from Good Food, Good Life by Curtis Stone. Copyright © 2015 by Curtis Stone. Excerpted by permission of Ballantine Books, a division of Random House LLC. All rights reserved.
Curtis Stone’s Chicken and Artichokes
Longer days, warmer nights. As we step out of spring and into summer, it’s the perfect time to switch up the menu and try something new. Add some Middle Eastern flair to your recipe repertoire with Grilled Chicken with Turmeric Spice Rub and Baby Greens. This recipe is great to whip up for family and delicious enough to serve guests at your first summer cookout.
Toasting spices before grinding them draws out their aromatic oils and intensifies their flavor. To make the spice mixture, grind toasted seeds into a powder that will adhere well to the chicken breasts. The yogurt sauce provides a cooling balance to the piquant dish and a creamy dressing for the mixed spring greens. I like the fact that you can do a lot of the prep — the pounded chicken, spice rub, and yogurt sauce — one day ahead.
I just returned from Italy, where artichokes (or carciofi in Italian) are celebrated with great enthusiasm. I absolutely love artichokes, devoting a whole menu to them at my restaurant Maude. While the humble artichoke — the edible flower bud of a thistle plant — has a reputation for being tricky to prepare and eat, its distinctive flavor and health benefits make it well worth the extra effort. When buying, look for artichokes that are plump, heavy, and firm, with tightly closed leaves. Once cut, artichokes discolor quickly, so prepare them just before you are ready to eat. While I like them as a light lunch, Braised Artichokes with Lemon Vinaigrette can be enjoyed as a side or main first course.
Grilled Chicken with Turmeric Spice Rub and Baby Greens
(Makes 2 servings)
- 2 boneless skinless chicken breasts
- 1/4 teaspoon whole coriander seeds
- 1/4 teaspoon whole cumin seeds
- 1/4 teaspoon whole fennel seeds
- 1/4 teaspoon cayenne pepper
- 1/4 teaspoon turmeric powder
- 4 teaspoons olive oil
Yogurt sauce
- 1/2 English hothouse cucumber, peeled, seeded, thinly sliced
- 1 cup plain lowfat yogurt
- 2 garlic cloves, minced
- 1 lemon
- 3 tablespoons chopped fresh cilantro
- 4 cups mixed baby salad greens
To prepare the chicken: Using meat mallet, lightly pound chicken breasts until thinned to about ½-inch thickness, being careful not to rip or tear chicken breasts.
To prepare the spice mixture: In heavy small frying pan, toast coriander, cumin, and fennel seeds over medium-high heat until spices begin to pop, shaking pan gently to jostle spices in skillet, about 2 minutes. Using mortar and pestle or clean coffee grinder, grind toasted spices into powder. Mix in cayenne pepper and turmeric.
To cook the chicken: Preheat barbecue for medium-high heat or a grill pan over medium-high heat. Sprinkle chicken breasts with salt and season generously with spice mixture. Drizzle with olive oil, then rub spice mixture into chicken breasts to coat. Grill chicken until brown grill marks form and chicken is just cooked through, about 2 minutes per side. Transfer chicken to two plates and let rest for 2 minutes.
To prepare the yogurt sauce: In small bowl, combine cucumber, yogurt, and garlic. Finely grate peel from half of lemon into yogurt mixture. Squeeze about 2 teaspoons of lemon juice into yogurt mixture. Add cilantro and stir to blend. Season to taste with salt and pepper.
To serve: Mound salad greens alongside chicken on plates. Drizzle sauce over chicken and serve.
Per serving
- Calories: 334
- Total Fat: 14.5 g
- Saturated Fat: 3.5 g
- Sodium: 222 mg
- Carbohydrate: 15.5 g
- Fiber: 3 g
- Protein: 36 g
- Diabetic Exchanges: 3.5 lean meat, 1 vegetable, 2 fat, 0.5 nonfat milk
Braised Artichokes with Lemon Vinaigrette

(Makes 4 servings)
Artichokes
- 20 baby artichokes, peeled, cleaned to the hearts
- Finely grated zest and juice of 2 lemons
- 3 bay leaves
- 3 thyme sprigs
- 2 teaspoons olive oil
- 1 teaspoon black peppercorns
- 1 shallot, halved
- 5 garlic cloves, crushed
- 1 teaspoon fennel seeds
Vinaigrette
- 2 teaspoons lemon juice
- 1 teaspoon water
- 1 teaspoon chopped shallot
- 3 teaspoons extra-virgin olive oil
Garnish
- 1/2 bunch fresh flat-leaf parsley, stems and leaves
- Chives, cut into ½-inch pieces
To prepare artichokes: Into large saucepan, place artichokes and all remaining ingredients. Add enough water to cover and season to taste with salt. Place pan over high heat until liquid comes to gentle simmer, then reduce heat to low and continue simmering for about 25 minutes or until artichokes are tender. Remove pan from heat and let cool for a few minutes before removing artichokes from cooking liquid.
To make vinaigrette: In medium bowl, whisk together lemon juice, water, and shallot, and then slowly drizzle in olive oil while whisking to blend. Season to taste with salt and pepper.
To serve: Cut artichokes in half lengthwise and gently toss them with vinaigrette to coat. Season to taste with salt and pepper. Garnish with chopped parsley and chives and serve.
Per serving
- Calories: 142
- Total Fat: 7 g
- Saturated Fat: 1 g
- Sodium: 72 mg
- Carbohydrate: 17 g
- Fiber: 6 g
- Protein: 3 g
- Diabetic Exchanges: 3 vegetables, 1 fat
Curtis Stone is the chef/owner of Maude and Gwen restaurants in Los Angeles.
This article is featured in the May/June 2019 issue of The Saturday Evening Post. Subscribe to the magazine for more art, inspiring stories, fiction, humor, and features from our archives.
Featured image: Ray Kachatorian
A Century of Fried Chicken
Decades of options for fried chicken from 1884 to 1982 — which one will you try?
—
1880s: ‘Scorch Off Hair’
Pick and clean, scorch off hair, wash, and cut up. Rub each piece with salt and sift a little pepper over. If very young, it may be put in the skillet and fried at once. Otherwise turn a small teacupful of water over, cover tight, and boil 20 minutes. When the water has dried out, put in a heaping spoonful of fried meat gravy, set the skillet on the top of stove, and fry till brown.
If gravy is desired, mix one egg with a dessertspoonful of flour and a cupful of milk — first making the flour smooth as for starch — and pour over the chicken when done, setting the pan in the oven long enough to cook the egg. —“Bill of Fare for Winter,” The Country Gentleman, January 17, 1884
1890s: ‘Have Your Pan Ready with Boiling Lard’
Take small spring chickens — large chickens will not be satisfactory — separate the joints, dip them each in egg, then in corn meal or white meal. Meanwhile, have your pan ready with boiling lard, and never put in additional lard while cooking the chicken. Lay as many pieces of chicken in the pan as will lie comfortably without squeezing. Fry a light brown, first on one side, then on the other; have a hot dish in which to put the chicken — keep hot. Make the sauce with the remains of the frying by putting a little cream, pepper and salt, and mixing nicely; throw in a little chopped parsley and pour the sauce around the chicken.
—“Useful Receipts,” The Saturday Evening Post, January 7, 1893
1910s: Pair with Baking Powder Biscuits
Salt the pieces and roll them in flour. Have the skillet hot, with plenty of lard at smoking heat. Allow the chicken to brown quickly on all sides. Then reduce the heat, add a little water from time to time and cook until very tender — an hour is not too long for a good-sized bird. When done make a rich cream gravy. Baking-powder biscuits are the best accompaniment for this dish.
—“Excellent Ways of Cooking Chicken” by Elizabeth L. Gilbert, The Country Gentleman, June 29, 1912
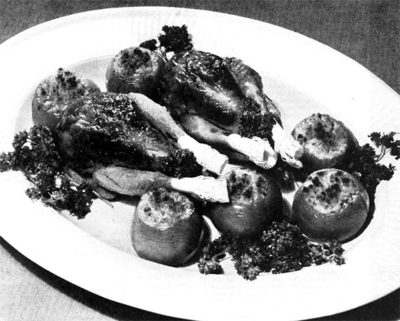
 1920s: A Wealth of Butter
We dress the chickens to be fried here the day before and leave them on ice. The next day we cut them up, saving out the giblets and bony pieces to make a stew for the next meal. If we are opulent in butter, which is usually the case here, we salt and lightly pepper the nice pieces, dust them in flour, and place them to fry in a skillet of hot fat or butter. We do this quickly, turning the pieces until they are golden brown.
—“Good Things to Eat” by Corra Harris, The Country Gentleman, October 1, 1928
1930s Faux Fry
Who doesn’t like fried chicken — if it is tender, juicy, and easy to eat? While the method of cooking to be described is not true frying, it offers simpler cooking and meat that has every appearance of fried chicken. Many eating places famous for their fried chicken use this method of preparing it.
Cut up the chicken into serving pieces, two halves for small chickens and quarters for larger sizes, or as for fricassee — 4 to 8 servings — for the largest bird.
If the bird is to be halved or quartered, first break the major joints. This makes for easier eating, more uniform and more satisfactory cooking. The pieces are flattened and stay flattened during the cooking.
Working from the inside, snap the two joints in the wings and the legs. This technique severs the cartilaginous tissue in those joints. One of these joints is the one which attaches the wing and legs to the body. The second joint in the leg attaches the thigh to the drumstick. In the wing, the second joint to be severed attaches the upper part of the wing to the second joint.
 For each 1 1/2 pounds of bird, use 1/3 cup of flour, 1/2 teaspoon of salt, and dash of pepper, if desired, and rub thoroughly into the surface of each piece. This coating is important to absorb surface moisture which keeps the meat juicy and avoids disagreeable spattering in frying. The pieces are then ready for frying, although many people prefer to have it dipped into beaten egg and crumbs after the flour coating.
Start cooking in fairly hot fat deep enough — about 3/4 to 1 inch layer — so that the pieces need to be turned only once to give a nice browning on outside. In frying, the larger pieces should be fried first, and better results come if the pieces are not crowded in the pan both in the frying and oven cooking. Transfer to covered casserole or roasting pan and cook in a slow to moderate oven, 300 to 350°F, from 1/2 to 1 1/2 hours depending upon the size.
The browning process may be done several hours, or even a day, in advance of the baking and serving time. It has the advantage of removing every trace of frying near or at mealtime. If the flavor of butter is desired, brush the surface with melted butter just before serving. Gravy may be made from the fat drippings left from the baking pan, adding more from the frying pan, if necessary.
—“Savory Surprises with Spring Chickens” by Kathryn Bele Niles, The Country Gentleman, May 1, 1938
1930s French Fry
French-frying chicken is a full-time job, but with a thermometer clipped to the side of the kettle of deep fat you can be surer of temperatures. First step in this kind of frying is to quarter or halve the chicken. Then dip in thin batter or in egg and crumbs. The batter makes a smoother coating, less likely to slip off and be left behind in the frying kettle. A mixture of one egg beaten up with three quarters of a cup of milk, one cup of flour on the scant side, and a teaspoon of salt is a good cover batter for chicken.
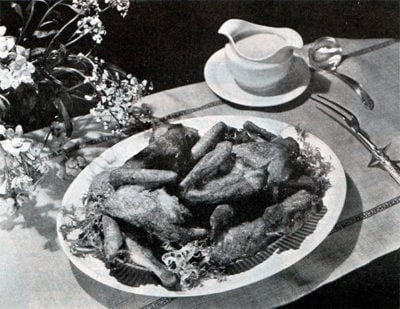 When you are ready to dip and slide the chicken in gently, have the kettle of deep fat heated to about 350° F. Again “hot but not smoking” is the word for it.
The moisture in the chicken makes the hot fat bubble and boil. So leave a safe margin at the top of the kettle and have a care for your own skin. A pair of kitchen tongs may prevent a burn on the hand, and they are easy on the chicken. With tongs, you can turn and lift each piece without piercing the brown crust and letting out juice.
Chicken completely immersed in deep, hot fat fries quickly. Started at 350°F, quarters of medium-sized young chicken are usually done in 10 to 15 minutes if you keep the temperature of the fat between 300 and 325°F.
That’s why restaurants feature this kind of fried chicken in their cooked-to-order service. But if more convenient, it can be finished slowly in the oven. I find it best, though, when it moves out of the frying kettle onto the plate with only a brief pause on thick absorbent paper to drain and get a sprinkling of salt and pepper.
—“Chicken — The American Way” by Ruth Van Deman, The Country Gentleman, July 1, 1939
1940s Crispy Coating
Roll pieces of young chicken in seasoned flour. Fry in deep hot fat (350°F) until brown, turning frequently. Finish cooking in covered pan in slow oven (325° F) — about 25 minutes. Spread out chicken and uncover for last 10 minutes’ baking for that crispy coating!
—“Six Things to Be Thankful For” Continental Can Company advertisement, The Saturday Evening Post, November 11, 1941
1940s Herb Mix
It’s something of an adventure to delve into the secrets of herbs and spices and flavorings. The artistry of cooking becomes a reality. Monotony of flavor is exchanged for tangy piquancy. So, in an experimental mood, let’s serve up some highly appetizing dishes, herb-seasoned to taste. You’ll want to try … a good quarter of a teaspoon of ground mace, nutmeg, or ground ginger to your country-fried chicken.
—“Seasoned to Taste,” The Country Gentleman, April 1, 1946

A Hint from Heloise
Nothing is printed in her column unless Heloise has tried it and knows that it works. In Hawaii, she hired neighbors to come and help with the testing. Once they fried chicken 50 different ways in every kind of utensil on the market. (They decided you can’t beat an old cast-iron pot with a few drops of yellow food coloring added to the shortening ‘for a golden crust that looks like an artist painted it.’)
—“Dishrags to Riches: The Saga of Heloise” by Maxine Cheshire, The Saturday Evening Post, March 2, 1963
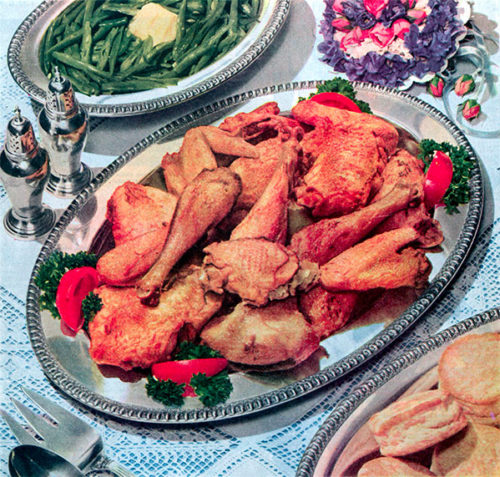
1940s Southern-Fried Chicken
The chicken fried in the Midwest is usually a large semi-adult bird, little short of the classification of hen. The Southern fried chicken is a barnyard subdeb, rarely more than 10 to 12 weeks old and weighing from a pound and a half to two pounds. Midwestern housewives moving to the South and buying frying-sized chickens at Southern markets are usually afraid they have been sold quail. That the younger, tenderer bird is the better suited for frying would seem to be unanswerable. Yet bad cooks have made it of ill repute with too much grease and weird coatings of batter. Actually, it requires merely a rolling in flour or a mixture of flour and meal, and frying in an adequate amount of hot fat. A suitable recipe for fried chicken may be had as follows:
- 1/2–2-pound fryer cut into pieces for frying
- 1–1 1/2 teaspoons salt
- 1/2 teaspoon pepper
- 1 cup flour
- 6–8 tablespoons bacon drippings or cooking fats or oil
Wash pieces of chicken well. Salt and pepper and roll each piece in flour, coating well — this will give the chicken the brown crust. Heat fat in skillet, add chicken, but do not place pieces on top of each other. Place lid on skillet so that steam will escape — this will prevent the outer crust from getting soggy. Sauté underside 15 minutes on medium heat until a golden brown. Then turn and brown the other side 15 minutes longer. Remove chicken from skillet when very tender and place on brown paper to absorb excess fat.
A two-and-a-half-pound chicken should be cooked 20 minutes on each side.
—“What’s Wrong with Southern Cooking?” by Ralph McGill, The Saturday Evening Post, March 26, 1949
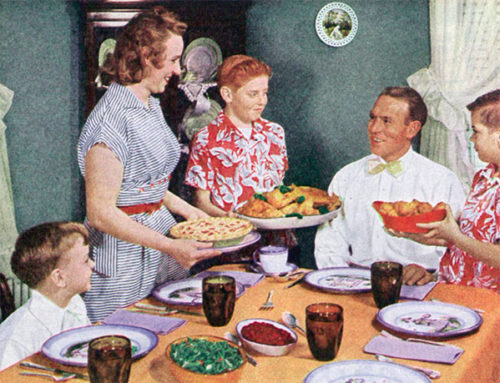
1950s Dad’s Favorite
Because he’s “a great guy,” the three Myers boys help cook dad’s favorite foods for this special Father’s Day dinner.
Different Fried Chicken
- 2 (3- to four-pound) fryers
- 4 cups tomato juice
- 1/4 cup chopped green pepper
- 1 or 2 garlic cloves
- 1 teaspoon dry mustard
- 1 teaspoon salt
- fat for frying
 Batter:
- 1 1/2 cups sifted flour
- 1 teaspoon salt
- 1 1/4 cups strained, seasoned tomato juice (from above sauce)
- 1 egg beaten
- Cut fryers into serving pieces.
- Combine tomato juice, green pepper, garlic, and seasonings in a large saucepan, and bring to a boil. Add chicken, cover pan, and cook over moderate heat 20 minutes.
- Heat fat for frying to 350°F.
- Make batter by combining flour and salt. Add tomato juice and mix until smooth. Add beaten egg and mix lightly.
- Remove chicken from sauce, drain, and dip pieces in batter. Fry in deep fat for 8 to 10 minutes, or until nicely browned. Drain on absorbent paper.
—“Dad’s Favorite Dishes” by Sara Hervey, The Country Gentleman, June 1, 1953
The Saturday Evening Post
December 12, 1959
1970s Shaker-Fried Chicken
- 2 spring chickens, quartered (broilers, fryers, 2 1/2 pounds each)
- 3 tablespoons soft butter
- 1 tablespoon fresh minced parsley
- 1 teaspoon minced fresh marjoram or 1/4 teaspoon dried marjoram
- 1/4 cup flour
- Salt and pepper
- 2 tablespoons butter
- 2 tablespoons lard
- 1 cup light cream
Select chickens weighing 2 1/2 pounds or a little over; smaller ones lack flavor and cook up waxy. Wash well and quarter. Rub thoroughly with soft butter and sprinkle generously with parsley and marjoram. Let stand for 1 hour at room temperature. Then roll in flour to which salt and pepper have been added. Melt the butter and lard in a heavy skillet and brown the chicken on all sides. Pour cream over it and let simmer, covered, for 20 minutes. Serves 6.
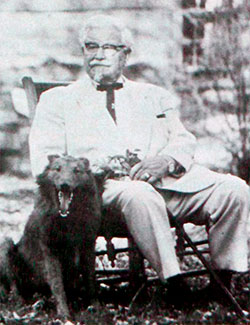
Fast-Fried from Colonel Sanders
In 1977, the Kentucky Fried Chicken mogul let us in on his secret for fast fried chicken — but he kept the 11 herbs and spices to himself:
“They say you can’t cook chicken in seven minutes, that it doesn’t get done, doesn’t get hot enough. They’ve got all these charts about the temperature and the time. I don’t know a damn thing about those charts, but I do know when the kitchen used to get to 120 degrees it was too damn hot for me to fry chicken.”
“Now, chicken is like a vegetable. It’s fresh and it’s delicate and it doesn’t like to sit around too long in a fryin’ pan. Still, it’s got to get hot enough to cook. Which means it takes too much time, destroys the delicate flavor. And, too, I don’t like the idea of keeping people waiting — you know, there’re other things to do — so along about 1939, after I’d tried everything else, I started preparing chicken in a special pressure cooker. The chicken fried quickly, it didn’t use a lot of oil, and it didn’t dry out inside because of the short cooking time which sealed in the natural goodness. I worked up the herbs and spices to bring out the flavor of the chicken — it’s the same formula they use in all 5,000 Kentucky Fried Chicken shops all over the world, and nobody’s improved on it yet.”
—“How to Make a Million After You’re 65” by Colonel Harland Sanders, The Saturday Evening Post, March 1977 and “The Man in the White Flannel Suit” by Starkey Flythe Jr., The Country Gentleman, December 1977
—“Shakertown: A Spirit Restored” by Linda C. Daniell, The Country Gentleman, September 1, 1977
1980s Low-Cal Crispy Baked Chicken
This chicken has the crispness and taste of fried chicken without the calories or cholesterol.
- 1 (2 1/2- to 3-pound) broiler/fryer, cut up
- 3/4 cup ground oat flour
- 1/2 cup corn meal
- 1/2 cup unprocessed wheat bran
- 1/2 cup raw wheat germ
- 1/2 teaspoon garlic powder
- 1/2 teaspoon onion powder
- 1/2 teaspoon sage
- 1/2 teaspoon thyme
- 1/2 teaspoon paprika
- 1/2 cup milk
- 1 egg
- 1/4 cup safflower oil, preferably cold-pressed
In plastic bag, combine all dry ingredients. In shallow bowl, combine milk and egg. Dip chicken, one piece at a time, into plastic bag to coat thoroughly. Dip into milk/egg mixture; coat again with dry mixture. Place in large shallow baking pan; drizzle oil over chicken. Bake at 400°F for 45 to 50 minutes or until tender and golden brown. Serves 4.
Tip: This coating mixture can also be used for fish.
—“Eat Your Way to Better Health” by Michele Gutter, The Saturday Evening Post, January/February 1980
1980s Crispy Fried Chicken for the Summer Picnic
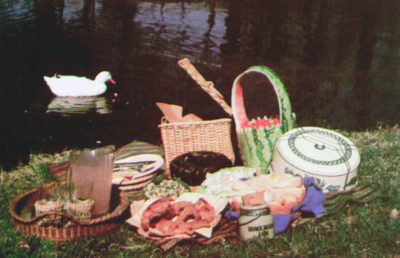 This recipe gives you what you really should want — chicken that is “fried to the bone.”
- 2 cut-up frying chickens (about 3 pounds each)
- 1 cup flour
- Salt and pepper to taste
- Paprika
- Dash of garlic powder
- 1 stick (1/2 cup) melted butter plus
- vegetable oil to equal the depth of 1 inch in frying pan or electric skillet
- Wash chickens and dry carefully in paper towels to remove excess moisture. Cut away excess fat.
- Pour flour in a paper bag and drop chicken pieces, a couple at a time, into the bag and shake until chicken is well coated.
- Season chicken liberally with salt, pep- per and paprika, and add a dash of garlic powder.
- Heat oil and butter over moderate heat (350–375°F). Fry chicken pieces, uncovered, half a chicken at a time. Do not crowd the skillet.
- Fry chicken about 30 minutes on each side, turning once, until golden brown. Lay chicken pieces on paper toweling to drain. Serves 8.
—“Man the Menu” by Jane E. Lasky and Janice Wald Henderson, The Country Gentleman, June 1, 1982
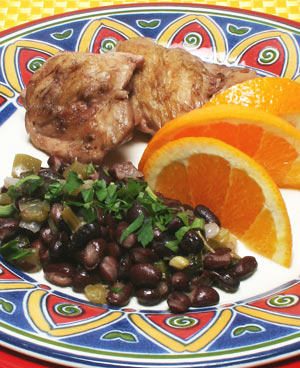
Brazilian Chicken and Black Bean Stew
To look good in their infamously skimpy bikinis, food-loving Brazilians must watch what they eat. So it is no surprise that in her recent cookbook, The Brazilian Kitchen, Leticia Moreinos Schwartz, who was raised in Rio de Janeiro’s Ipanema, offers lighter versions of popular Brazilian dishes while still giving them alluring flavor.
“I fix the heaviness and use simple-to-find ingredients,” Schwartz says. Her interpretation of the stew called feijoada (fey-zhoo-ah-dah), an elemental dish of Brazil, is a perfect example. Instead of the fatty pork Brazilians normally use, Schwartz uses chicken. Skinless thighs are ideal, but I find bone-in breasts work well, too.
I also streamlined the cooking time in my version of Brazilian chicken and black beans by using canned beans rather than dried. In addition to saving time, this lets me prepare the dish to serve six rather than the huge potful that Schwartz cooks up to feed a crowd.
Brazilian Chicken and Black Bean Stew
(Makes 6 servings)
Ingredients
- 2 tablespoons canola oil, divided
- 2 pounds skinless chicken thighs with bone or skinless breast with ribs or combination
- ½ cup fat-free, reduced-sodium chicken broth
- 1 ¼ cups chopped onion
- ¾ cup chopped celery
- ¾ cup chopped green bell pepper
- ¾ cup chopped scallions, green and white parts
- 3 garlic cloves, chopped
- 2 bay leaves
- ¼ teaspoon freshly ground nutmeg
- 2 (15-ounce cans) black beans, rinsed and drained
- Salt and freshly ground black pepper
- ⅛ teaspoon cayenne pepper, or to taste
- 2 tablespoons chopped flat-leaf parsley
- 1 large navel orange, cut in 6 wedges
Directions
- In large Dutch oven, heat 1 tablespoon oil over medium-high heat. Add chicken and cook until golden brown, 4 minutes on each side. Using tongs, transfer chicken to large bowl. Cover bowl with foil.
- Add broth to pot and scrape bottom of pot while boiling, gathering up all browned bits.
- Pour broth over chicken. Seal foil tightly over bowl and set chicken aside. Using paper towel, wipe out pot.
- Return pot to medium-high heat and add remaining oil. Add onion, celery, green pepper, and scallions to pot and cook, stirring occasionally, until soft, 5 minutes.
- Add garlic and cook, stirring, for 1 minute. Add bay leaves and sprinkle nutmeg over vegetables. Arrange chicken pieces over vegetables, reserving liquid in bowl.
- Spread beans over chicken. Pour liquid from bowl over beans. Cover and simmer until chicken thighs are falling-apart tender, 30-35 minutes. If using breast, cook until white in center at thickest part, 20-25 minutes.
- To serve, divide chicken among 6 dinner plates. Remove bay leaf. Mix to combine beans and vegetables, and season to taste with salt, pepper, and cayenne. Spoon liquid from pot over chicken and ⅔ cup beans and vegetables alongside chicken. Garnish with parsley and orange wedges. Serve hot, warm, or at room temperature. Leftovers keep in tightly covered container in refrigerator for 4 days.
Nutrition Facts
Per Serving:
Calories: 330
Total fat: 10 g
Saturated fat: 1.5 g
Carbohydrate: 28 g
Fiber: 9 g
Protein: 32 g
Sodium: 180 mg